Views: 0 Author: Site Editor Publish Time: 2025-08-08 Origin: Site


Insert molding is a smart way to save money and make better products. When you use insert molding, you put metal and plastic together in one part. This means you do not need as much assembly. You also have fewer steps to finish the product.
At GuangChao Mould, we specialize in delivering high-quality insert molding solutions tailored to your specific needs. Whether you're looking to reduce part cost, improve product strength, or speed up production, our team is ready to help. Let us show you how insert molding can transform your manufacturing process.
Look at the numbers below to compare:
| Factor | Insert Molding | Traditional Assembly |
|---|---|---|
| Tooling Cost | $15,000 - $40,000 | $25,000 - $60,000 |
| Part Cost (10,000 units) | $2.50 - $5.00 | $3.50 - $7.00 |
| Cycle Time | 30 - 45 seconds | 45 - 90 seconds |
You can see that insert molding helps you spend less on tools and parts. It also makes the work go faster and helps you earn money sooner.
With insert molding, you make less waste and do not need extra assembly. Your process is easier. Automation helps you save on labor and work more efficiently.
Insert molding connects metal and plastic in one step. This saves money because it needs less assembly. It also makes production faster.
If you use the right design rules and mold settings, parts get stronger. This also helps stop defects and lowers waste.
Automation in insert molding makes things faster. It also lowers labor costs and keeps quality the same.
Insert molding is good for many industries. It makes strong parts like car parts, electronics, and medical tools.
Insert molding is faster than overmolding. It is better for big jobs that need strong metal-plastic bonds.
Insert molding helps you spend less money in many ways. You join metal and plastic at the same time, so you do not need screws or glue. This means you pay less for putting things together and for workers. You also avoid problems like loose parts or things not fitting right, which can cause waste.
You can make products smaller and lighter because you can mix materials easily.
You use less stuff and have fewer steps to finish your work.
Insert molding skips extra steps like soldering or adding threaded inserts, so you save more money.
Tip: Buying advanced molding machines costs more at first, but you save money later because you need less work and assembly.
Insert molding gives you parts that are stronger and last longer. When you set up the injection process the right way, the metal and plastic stick together better. This helps your product work well for a long time.
Here is a table that shows how different injection molding settings change strength:
| Injection Molding Parameter | Optimum Value | Effect on Mechanical Strength |
|---|---|---|
| Barrel Temperature | 260 °C | Better adhesion and tensile strength |
| Injection Pressure | 127.6 MPa | Full cavity filling and strong bonding |
| Holding Time | 60 s | Complete fabric impregnation |
You can see that using the best settings really helps. For example, tensile strength can reach 120 MPa, which is almost four times stronger than normal plastic. This means your parts can take more force and last longer.
Plastic insert molding helps you work faster, especially when you make lots of parts. The cost of the mold spreads out, so each part is cheaper. You can make many parts quickly in each cycle.
Injection molding makes sure every part is the same and meets your quality needs. You can also make hard shapes and use many materials. This helps you meet different needs and keep your work going well.
Note: With plastic insert molding, you can make more parts when you need them, and you do not lose quality or speed.
You should use smart design rules for insert molding. Good design helps you stop problems like warping or weak bonds. Here are some simple rules to follow:
Keep wall thickness between 1.5–3.5 mm for most thermoplastics. This helps resin move well and stops warping.
Make walls the same thickness. Do not make sharp changes near inserts. This keeps cooling even and stops sink marks.
Add draft angles of 1–2° on vertical walls. Do not put parting lines through inserts. This helps stop sticking and warping.
Make sure inserts have the right shape. Use press-fit or small gaps. Add undercuts, knurls, or flats to keep inserts from moving.
Pick insert materials that match the plastic resin. Plated brass or stainless steel work well. This stops bonding problems.
Plan how resin will flow. Place gates and flow paths so resin does not push inserts out. Let resin move around inserts to stop trapped air.
Use alignment features like grooves, pins, or chamfered edges. These help you put inserts in the same spot every time.
Design cooling layouts that handle heat from metal inserts. This stops warping and keeps parts the right size.
Test your design early. Use prototypes, simulation tools, and tests like pull-out force. This helps you find and fix problems before making lots of parts.
Leave enough space around inserts. Keep at least twice the wall thickness from the edge. This stops cracking during ejection or when under load.
Tip: If you follow these rules, you can stop defects and save money by making less waste.
Putting inserts in the right place is important for strong parts. You can use some best ways to make sure inserts stay in place and bond well.
Use pins, clamps, or other tools in the mold. These hold inserts steady and stop them from moving.
Design inserts with knurls, grooves, or undercuts. These help the plastic grip the insert and make a strong bond.
Pick inserts and plastics that work well together. Think about how they react to heat and chemicals to stop bonding problems.
Use machines to place inserts if you can. Automation gives you the same results each time and saves work.
Put gates in the mold so plastic flows evenly around the insert. This stops air from getting trapped.
Add vents in the mold. Good venting lets air out and stops voids or burns.
Control injection pressure, temperature, and cooling time. Careful control gives you strong bonds and short cycle times.
Use draft angles and even wall thickness in your design. This makes it easier to take parts out and stops defects.
Check inserts before molding. Look at the final parts to catch problems early.
Work with your manufacturing partner. Fix the process together for the best results.
Note: Good insert placement makes parts stronger and helps you save time and money by stopping defects and making work faster.
You can follow easy steps for insert molding to save money and make good parts. Each step helps you save and get better quality.
Loading Metal Inserts: Put inserts into the mold. You can do this by hand for small jobs or use machines for big jobs. Machines make work faster and cost less. Right placement means strong bonds and fewer problems.
Injecting Molten Plastic: Push molten plastic into the mold with high pressure. This covers the inserts and makes a strong bond. Watch temperature and pressure to stop problems. Good control means less waste.
Cooling and Ejecting Molded Parts: Let the part cool in the mold. Hold pressure to keep the shape and stop warping. Take parts out carefully to keep them nice.
Separating Parts from Sprues: Take parts off the sprues with care. This keeps the product looking good and working well.
Cost Analysis: Insert molding skips extra assembly steps. This saves time and labor costs. Machines save even more by making work faster. You make less waste and get more value from each run.
Quality control is important at every step. Check materials, use controls, and train your team well. These steps help you find problems early and keep things running smoothly.
If you follow these steps, you can make strong parts and keep costs low. The insert-molding process lets you join metal and plastic in one step. This makes your production line faster and cheaper than regular plastic injection molding.
Insert molding is used for many different parts. It is best when you need metal and plastic together. This process works with thermoplastics like Nylon, ABS, Polycarbonate, and Polyethylene. Thermosets like Polyester and Epoxy also work well. Metal inserts, such as brass or steel, must handle heat and pressure.
Some common parts made with insert molding are:
Threaded fasteners and gears for cars
Electrical sensors and connectors
Digital control panels and knobs
Medical device housings and dental tools
Wires with rubber outsides
Plastic insert molding lets you make tricky shapes and strong bonds. You can build parts that are hard to make with normal assembly. This gives you more design choices and stronger parts.
Tip: Custom insert molding lets you make parts that fit your needs. At GuangChao Mould, we’ve served clients across the automotive, medical, and electronics industries with robust insert molding solutions. Our experience with various thermoplastics and complex insert shapes makes us the trusted partner for precision, performance, and scalability.You can use different materials and shapes in one step.
Many industries use insert molded parts because they are strong and last long. In cars, insert molding is used for dashboards, sensor covers, and strong parts. The process mixes metal strength with plastic flexibility. This makes parts lighter and tougher.
Consumer electronics use multi-material injection molding too. You see it in connectors, cases, and control panels. The process puts inserts in the right spot and makes strong bonds. Medical devices use insert molding for prosthetics, covers, and dental tools. These parts meet tough safety and strength rules.
Insert molding joins metal and plastic in one step. You save time and money, and your parts last longer.
You might wonder how insert injection molding and overmolding are not the same. Both use injection to join materials, but they have different steps. Insert injection molding starts by putting a metal or plastic insert into the mold. Then, molten plastic is injected around the insert in one step. This makes a strong bond between the insert and the plastic.
Overmolding uses two steps instead of one. First, you mold a base part and let it cool down. Next, you put this base into another mold. A softer or different material is injected over the base part. This method helps make things easier to hold or more comfortable.
Here is a table that shows the main differences:
| Aspect | Insert Injection Molding | Overmolding |
|---|---|---|
| Process Steps | Insert placed in mold; plastic injected around it in one step | Base part molded and cooled; placed in second mold; second material injected over base |
| Material Application | Plastic molded around pre-formed insert (often metal) | Softer or secondary material molded over rigid base |
| Purpose | Reinforce components; reduce assembly time | Improve grip, comfort, durability; enhance ergonomics |
| Material Compatibility | Mechanical bonding between metal inserts and thermoplastics | Chemical or mechanical bonding between plastics |
| Tooling & Cost | Single mold with insert placement; insert made separately | Two-step process; needs two molds or complex two-shot mold |
| Common Applications | Structural parts, electronics, automotive parts | Tool handles, medical devices, grips |
Tip: Insert injection molding is best when you need to join metal and plastic in one strong part. Overmolding is good for adding soft grips or extra layers.
Both insert injection molding and overmolding help save time by cutting out extra assembly steps. But their costs and how fast they work can be different. Insert injection molding usually costs more at first because the mold must hold the insert. You also need to make the inserts before you start. This method works best when you make lots of parts, so the cost is spread out.
Overmolding often costs less at the start, but it takes longer to finish each part. You need two injection steps and sometimes two molds. This makes the cycle time longer and can mean more work if you do it by hand. For big jobs, using machines for two-shot injection helps, but it is harder to set up.
Here is a table to compare cost and efficiency:
| Factor | Insert Injection Molding | Overmolding |
|---|---|---|
| Initial Cost | High, due to complex mold and insert placement | Lower initial tooling cost |
| Production Volume | Best for high volume to offset tooling cost | Good for low to medium volume |
| Material Cost | Depends on insert complexity and materials | Variable, depends on application |
| Labor Intensity | Manual or robotic insert loading | Two-shot (automated) or pick-n-place (manual) |
| Cycle Time | Shorter, single injection step | Longer, two injection steps |
Insert injection molding can cut assembly time by up to half. Using robots to load inserts makes it even faster and cheaper for big jobs. Overmolding also saves assembly time, but the two steps mean you spend more time on each part.
Note: If you want the fastest cycle time and best efficiency for making lots of parts, insert injection molding is often the best choice. Overmolding gives you more ways to design soft-touch parts, but it can take more time and cost more to set up.
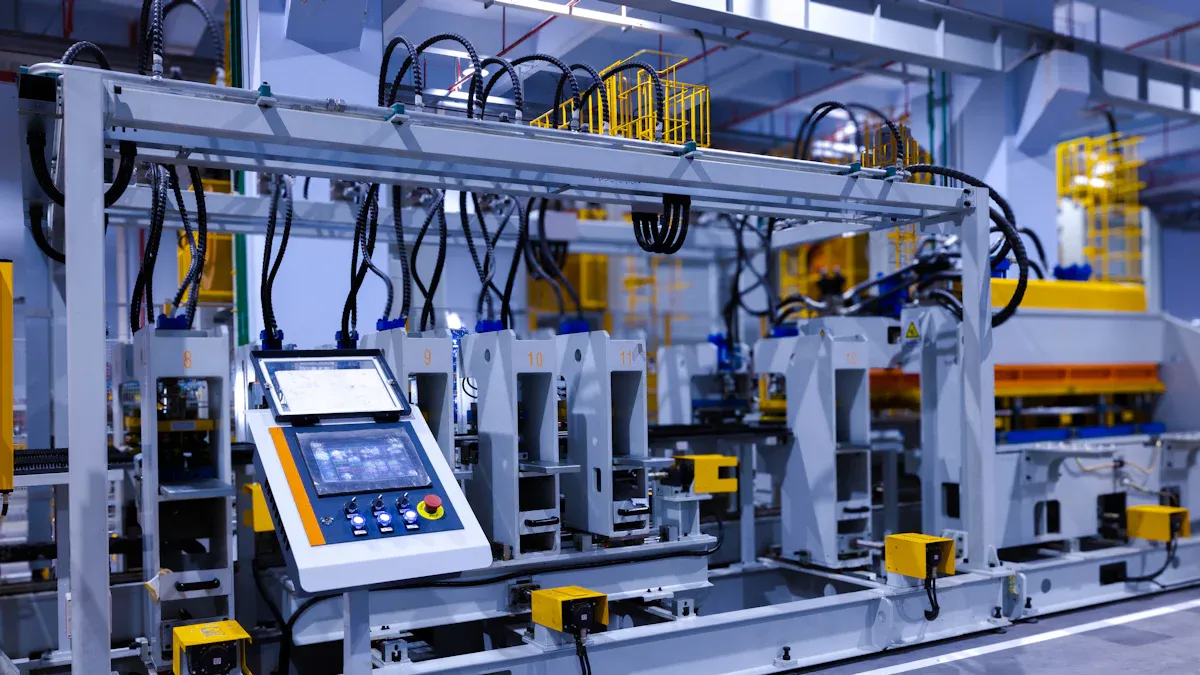
You can make parts faster and spend less money by using automation in insert molding. Robots put inserts in the right spot every time. They do not get tired or need breaks. This means you need fewer workers and can make more parts quickly. New machines use special robots that can handle even tiny inserts. These robots also help take out parts, trim them, and check for mistakes. This way, every part is made the same way each time.
Automation lets the machines work all the time and saves on worker pay.
It helps every part meet your quality needs by stopping human mistakes.
You can watch how things are going and fix problems right away.
One company used automation and made 40% more parts. You can see big improvements in speed and money saved, especially when making lots of parts.
Tip: Use workcells with automation to control everything from putting in inserts to checking finished parts.
Quality control makes sure your insert molding always works well. You should use both horizontal and vertical machines with automation to stop mistakes. Good controls help you avoid missing inserts, which can slow down work or break things. Use clamps, magnets, or vacuums to keep inserts in place during molding.
Sensors watch each step as it happens.
Special control systems change settings by themselves to stop bad parts.
Cameras and smart computers find problems right away.
DFMEA helps you find weak spots before they cause trouble. Having skilled workers and automation together gives you the best results.
Smart design makes insert molding easier and saves money. Start by picking materials that stick together well. Make inserts the right shape and size so they fit just right. Put inserts in places that keep the mold balanced and lower stress.
Pick metal inserts and plastics that bond well.
Use close measurements to stop mistakes.
Plan where to put inserts for better strength.
Work with your team early to find and fix problems.
Working together early helps you waste less and make parts faster. This way, you spend less and your insert molding project works out well.
Insert molding lets you save money and work faster by joining metal and plastic together in one piece. Many businesses, such as car makers and hospitals, use insert molding to make strong parts and finish work quicker. You should check your product plans to see if insert molding is right for you.
Think about what materials you will use, how good your suppliers are, and how you will check quality before you begin.
Pay attention to new ideas like robots and smart machines that help make better parts.
Ready to take the next step? GuangChao Mould is here to help you explore insert molding solutions customized to your product and budget. Reach out today to get expert advice and a free project evaluation.
Insert molding lets you join metal and plastic in one step. You place a metal insert in a mold. Then, you inject plastic around it. This process makes strong, reliable parts.
You save money because you skip extra assembly steps. You use fewer workers and less material. Automation also helps you make more parts in less time.
You can use thermoplastics like Nylon, ABS, and Polycarbonate. Brass and stainless steel inserts work well. Always match the plastic and metal for strong bonds.
Yes! Robots can load inserts and remove finished parts. Automation helps you make parts faster and keeps quality high.


